This is a follow-up to a post I wrote a couple of years ago.
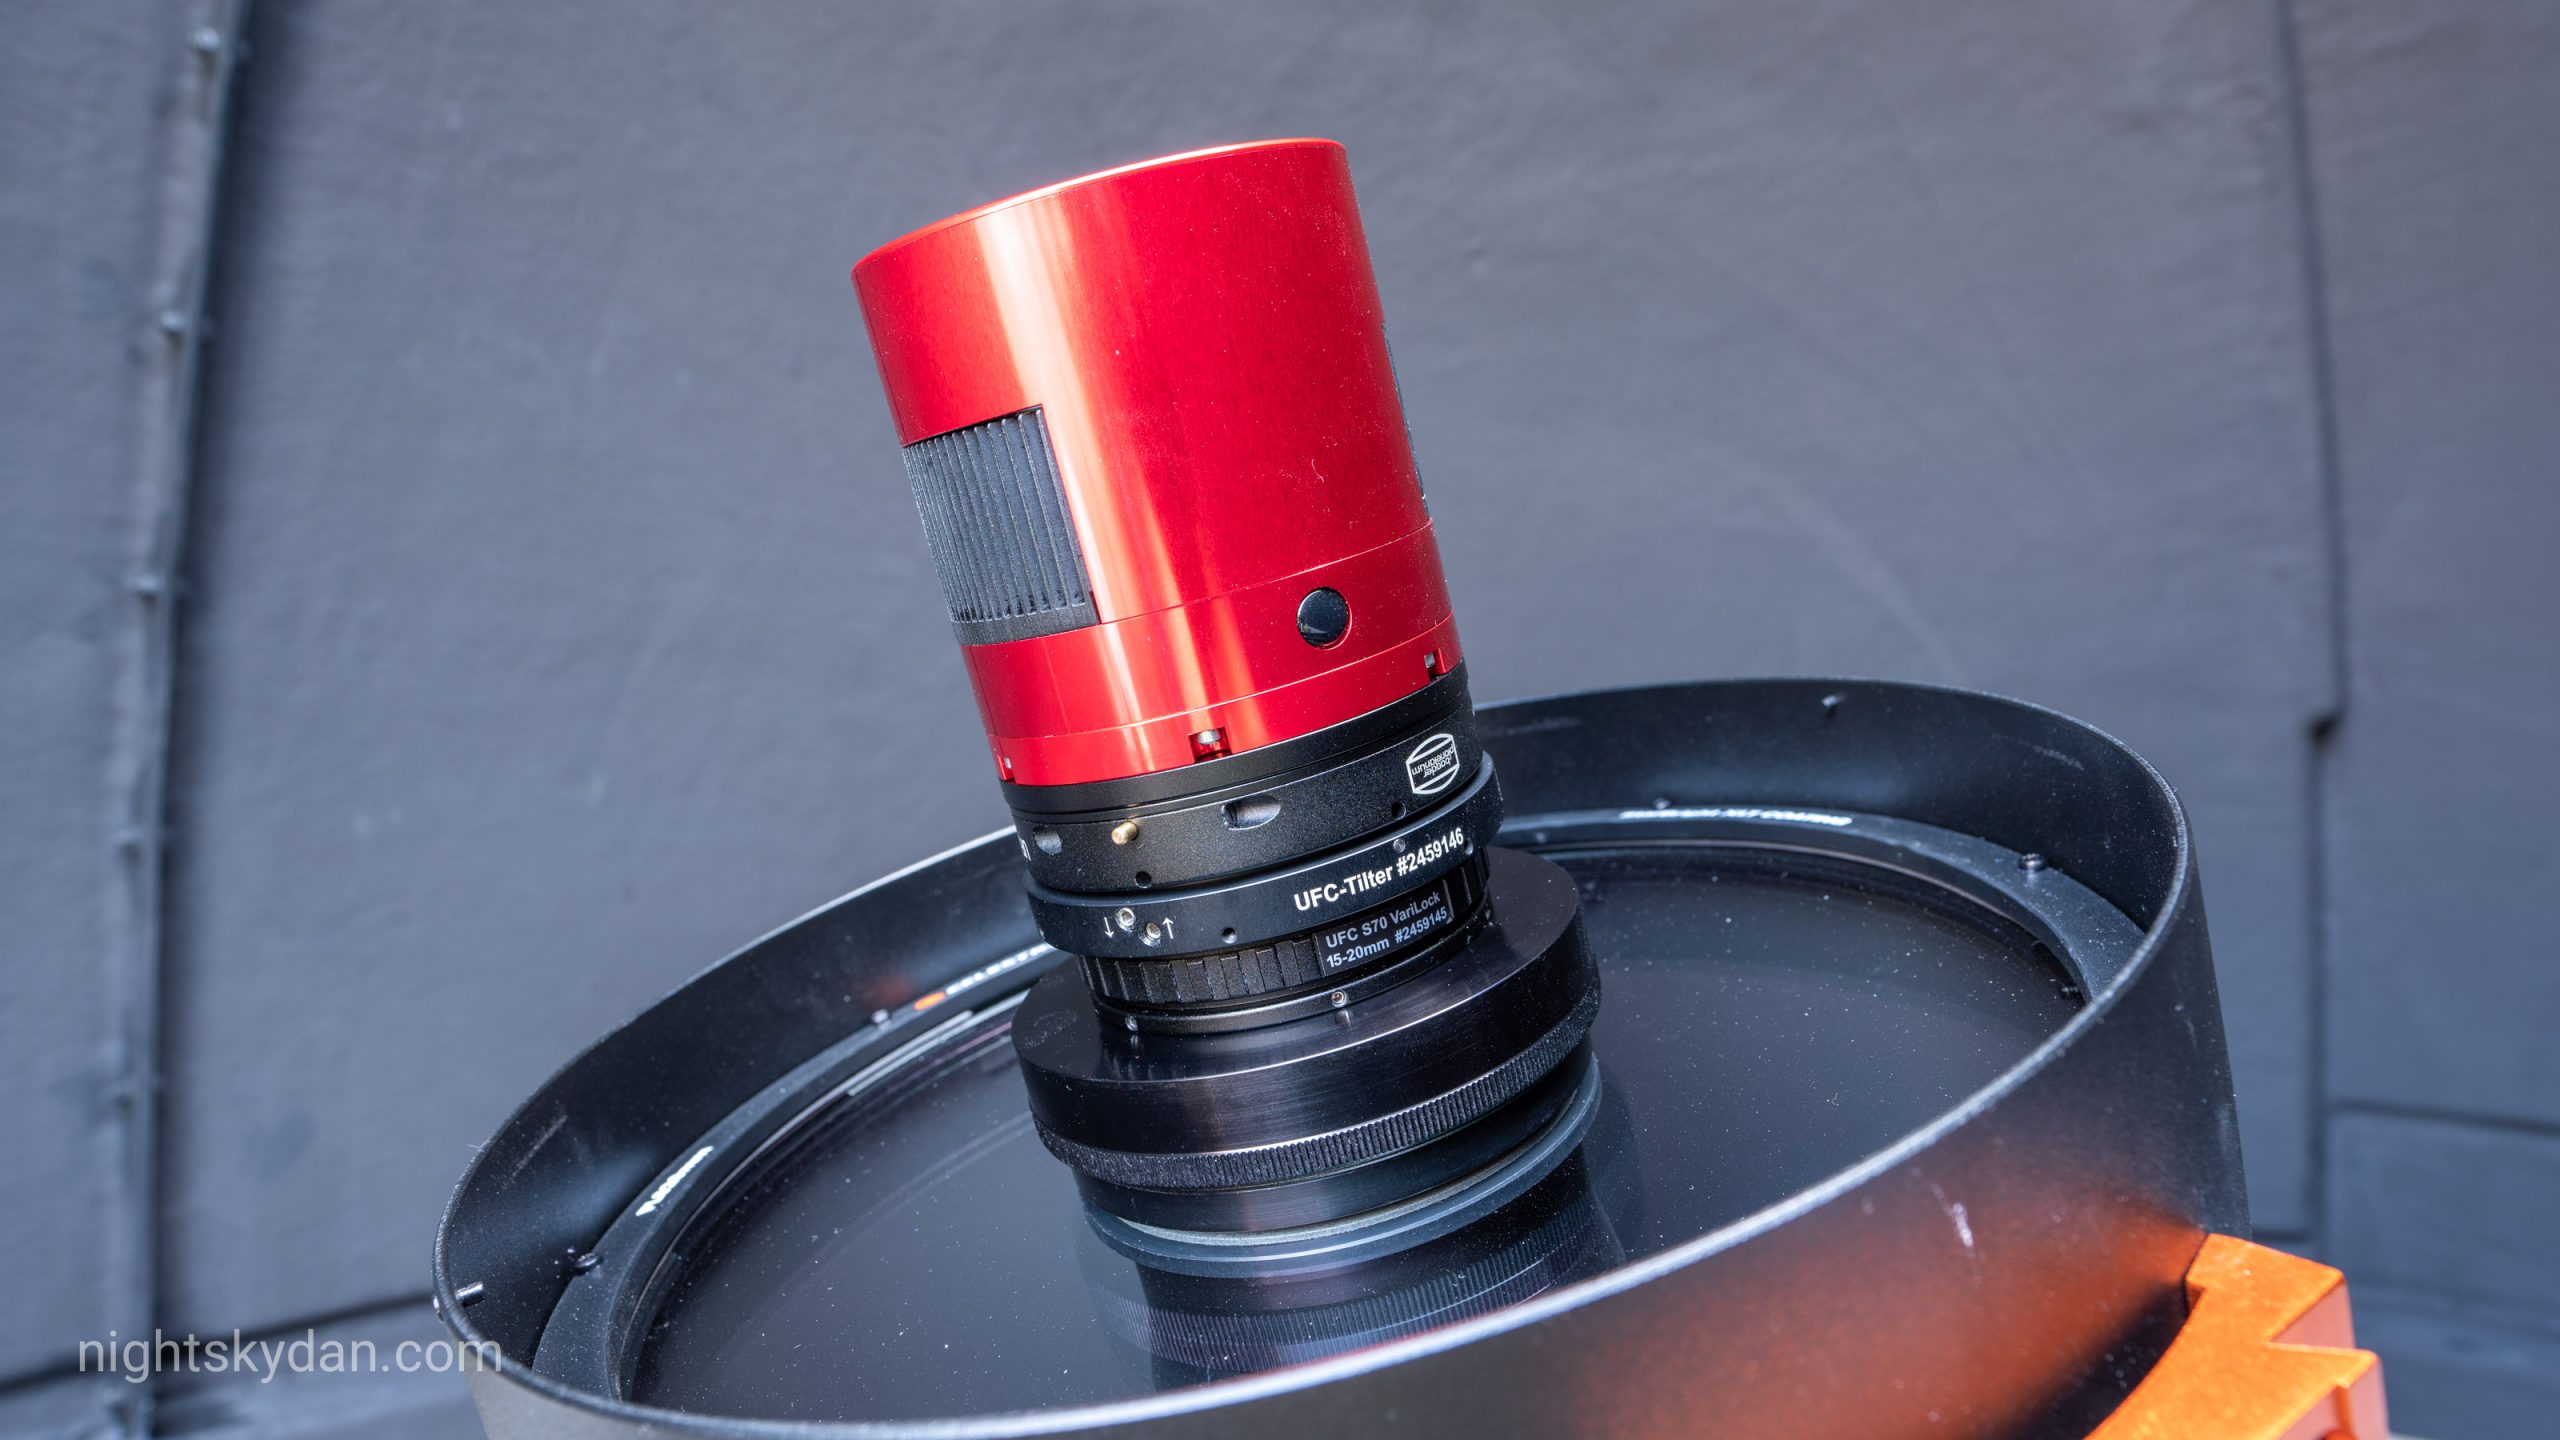
I recently upgraded to a full-frame ZWO ASI6200MC Pro camera, and have altered the adapters I use when connecting this camera to my RASA 11″. This post will detail the adapters I am now using.
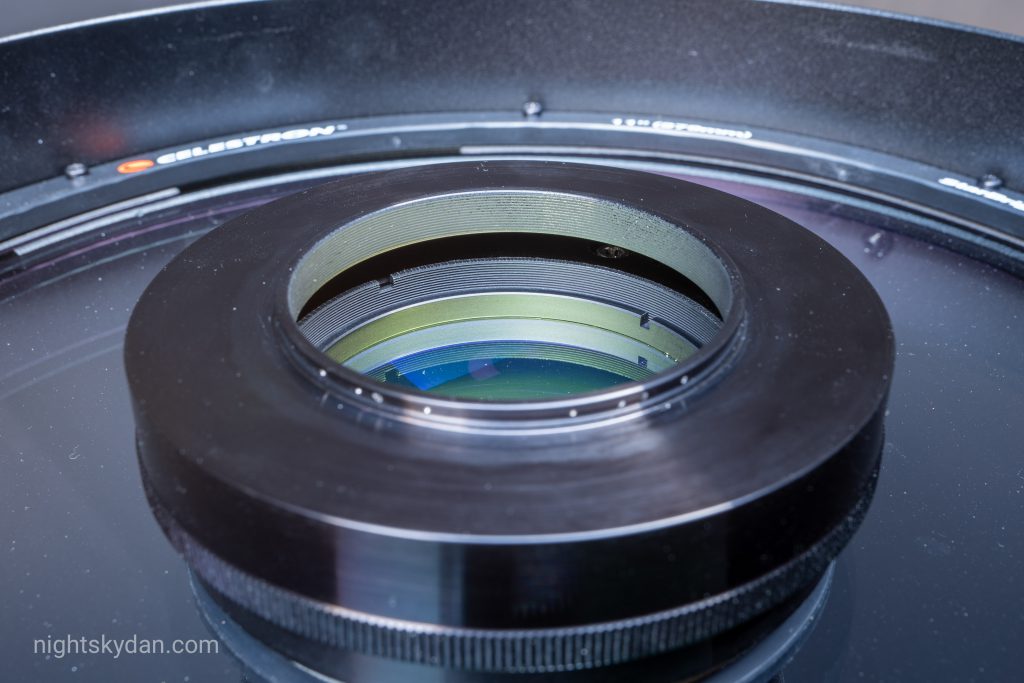
First, to try and eliminate as much vignetting on this full-frame camera as possible, I use the screw-in Celestron Light Pollution Imaging Filter for the RASA 11″. I also still use the Baader UFC system, as the interior of these adapters is wide enough to ensure the light path isn’t obscured. Also, if I ever want to include other filters I can do so by using the Baader UFC filter slider.
However, there is a problem that occurs when attempting to use the Baader UFC RASA adapter with the Celestron Light Pollution Filter installed. As shown in the photo below, the top edge of the Celestron light pollution filter sits a couple of millimetres above the front tilt plate of the RASA. This means the Baader UFC RASA adapter is no longer able to lay flush on the tilt plate, as it sits on the top edge of the light pollution filter instead.
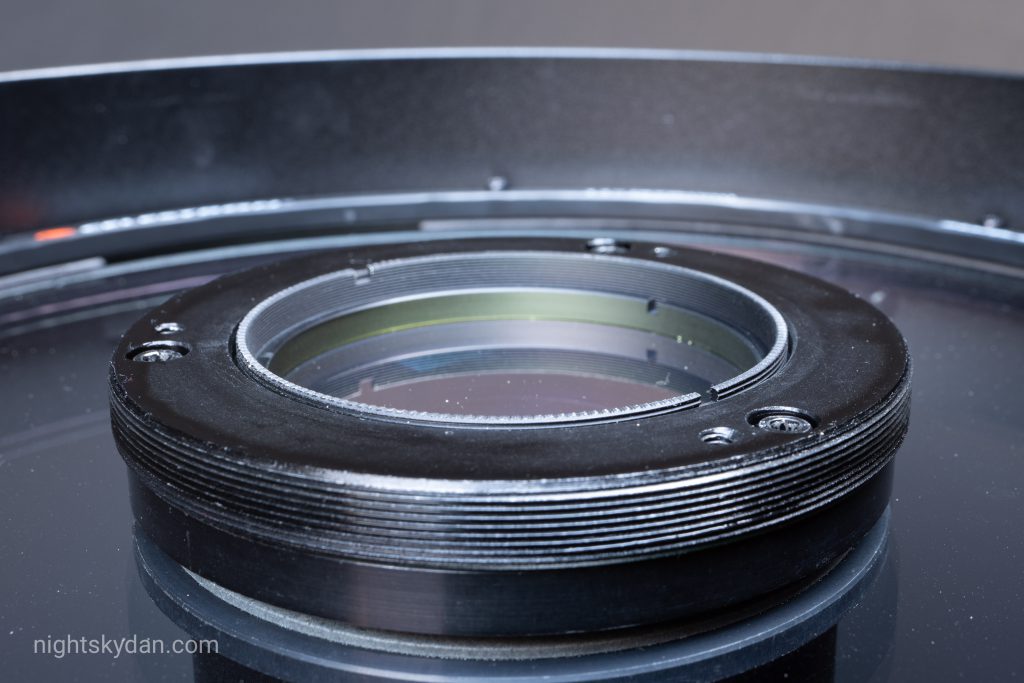
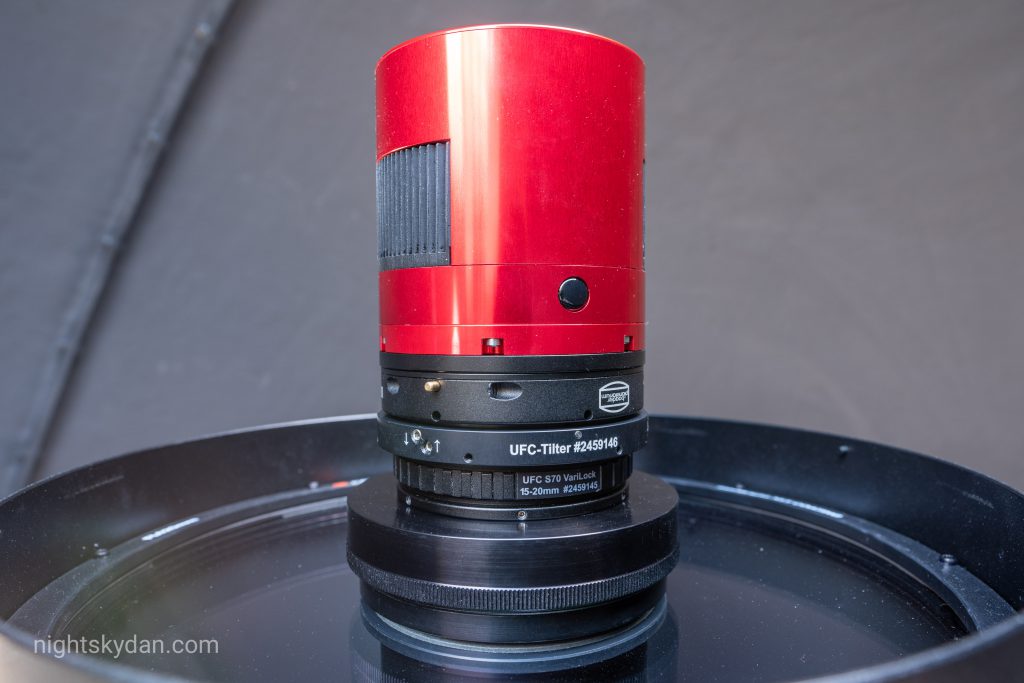
To enable the reliable use of this filter I ordered a custom RASA 11″ to Baader UFC adapter from PreciseParts that would provide space for the light pollution filter, and enable me to continue using the Baader UFC system:
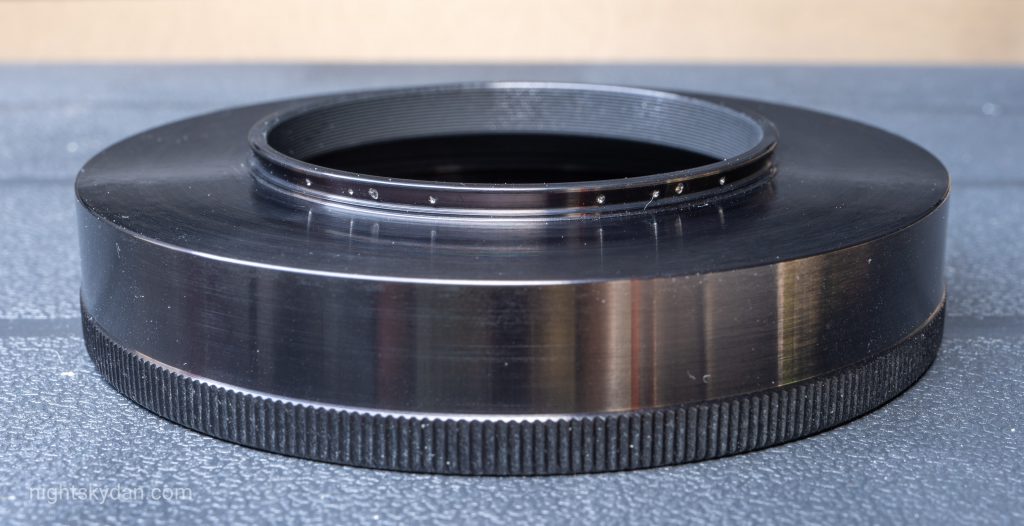
The custom PreciseParts adapter doesn’t use the Celestron RASA clamp ring, and instead screws straight on to the front of the RASA. I ordered the adapter with an effective length of 12mm – I could have ordered it in a longer length, but I wanted to allow for any future UFC adapters I may install, such as the new Baader UFC Tilter detailed further on in this post.
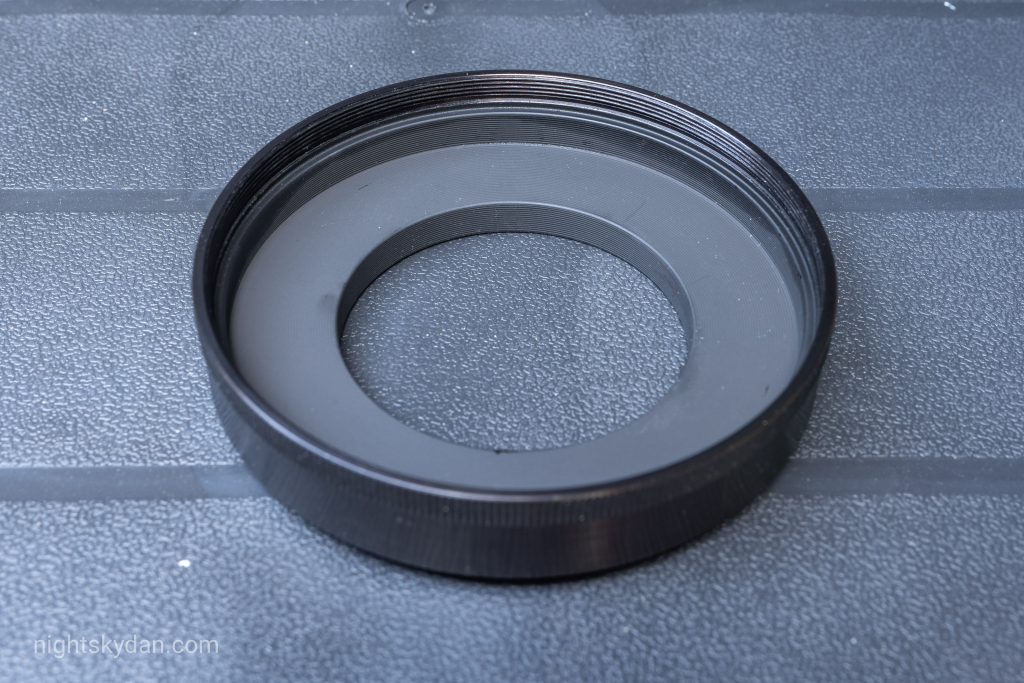
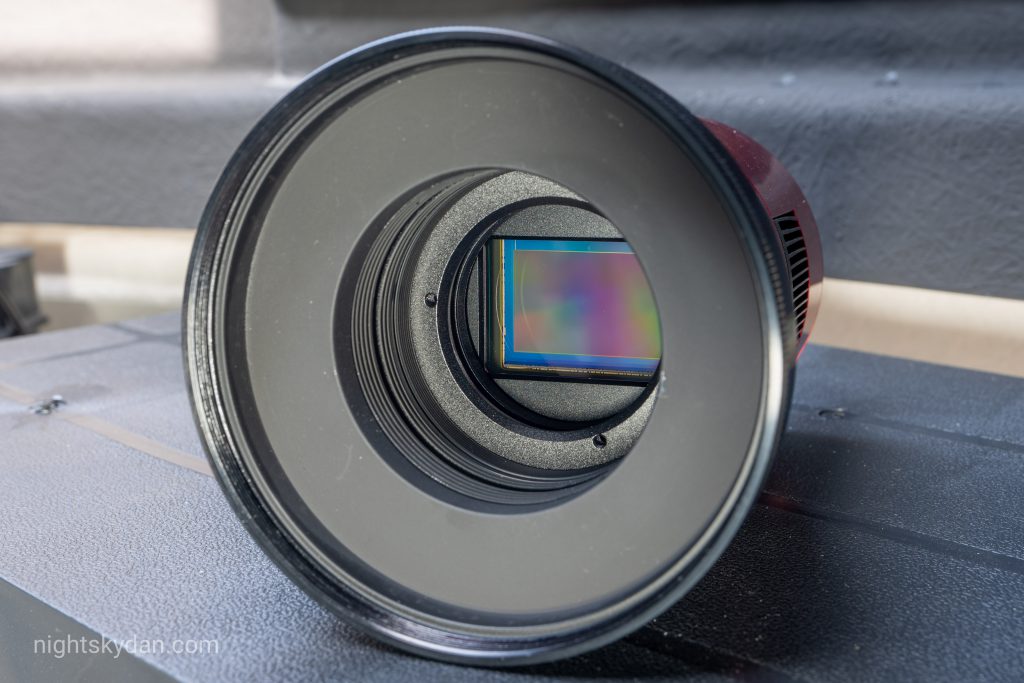
When installed on the RASA, you can see the adapter has plenty of space within for the Celestron Light Pollution Filter:
The PreciseParts adapter provides a secure fit, but I did notice it needs to be screwed on fairly tight to ensure it doesn’t wiggle/tilt slightly (caused by slight looseness between the threads of the adapter and the threads of the RASA tilt plate). It is nice and secure once screwed on tight though.
With this type of custom adapter installed, it’s important to note it does obscure the collimation screws on the front of the RASA (which I’ve never adjusted, or wanted to adjust!), but Baader recently released a new tilt adapter for the UFC system which I went ahead and ordered. This allows for minor adjustments to the spacing and tilt without having to use the collimation screws on the RASA or the tilt screws on the camera (which are inaccessible when the camera is installed anyway). Here is the UFC Tilter:
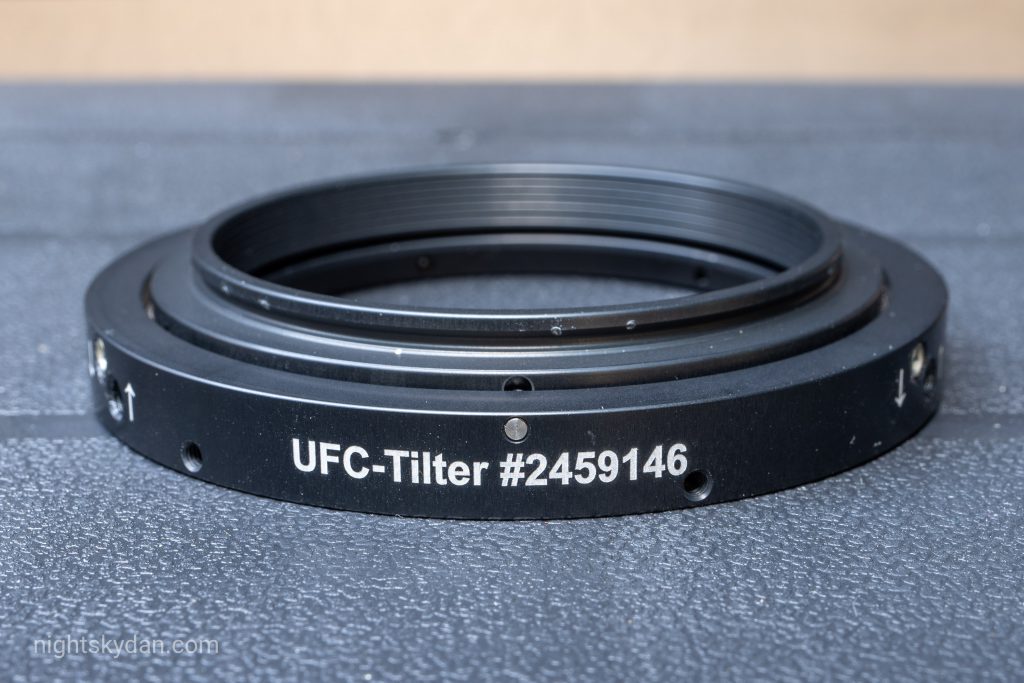
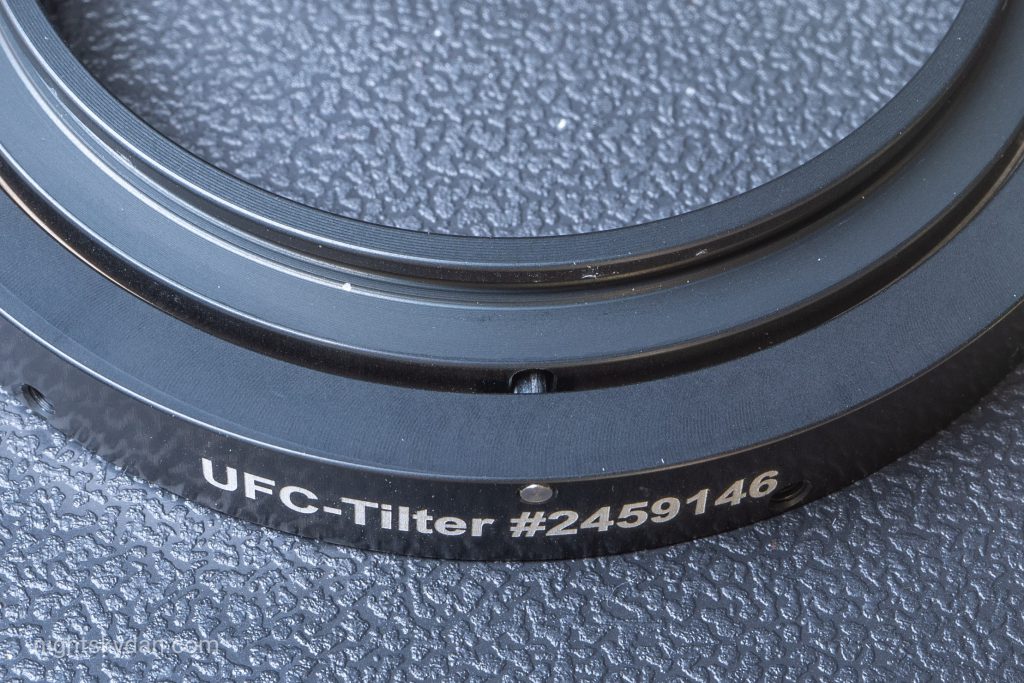
The UFC Tilter consists of an outer and inner ring. The tilt of the inner ring can be adjusted (up to 1° of tilt) by using three pairs of push and pull screws located around the edge of the outer ring (shown below). The spacing of this adapter varies from 9.75mm to 10.50mm, depending on the extent of the tilt adjustment.
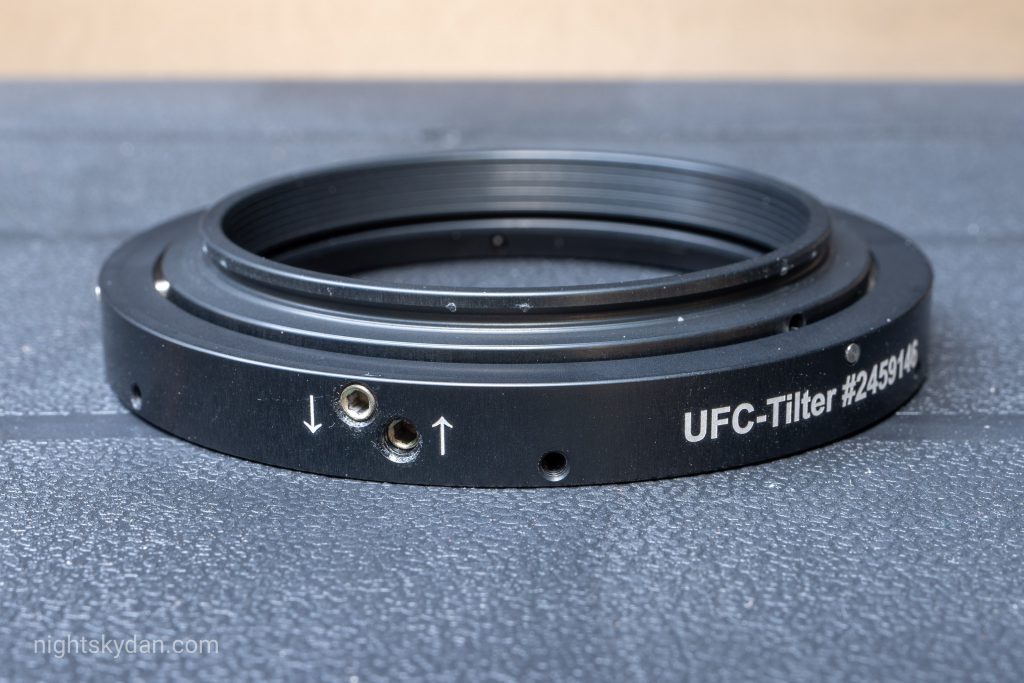
The inner ring is held in place by three pins that protrude from the outer ring, and this ensures it doesn’t come apart when adjusting the tilt! One of the pins is visible in this photo:
To complete the imaging train, I also use the Baader UFC VariLock adapter and the Baader UFC Base Filter Chamber. The ZWO ASI6200MC Pro is then attached using the Baader UFC M54 camera adapter, providing a configuration that is shown below. To ensure no stray light (or dust) enters the imaging train, I have an empty Baader UFC 50mm Filter Slider installed.
Once installed, I adjust the rotation of the camera so the bottom two corners of the sensor roughly line up with the positions of two of the push/pull screws on the UFC Tilter. I do this by performing a one-off adjustment of the angle of the Baader UFC Filter Slider Base, which sits on top of the UFC Tilter.
This combination of adapters provides a reasonably wide and unobstructed view to the full-frame camera sensor, as shown below.
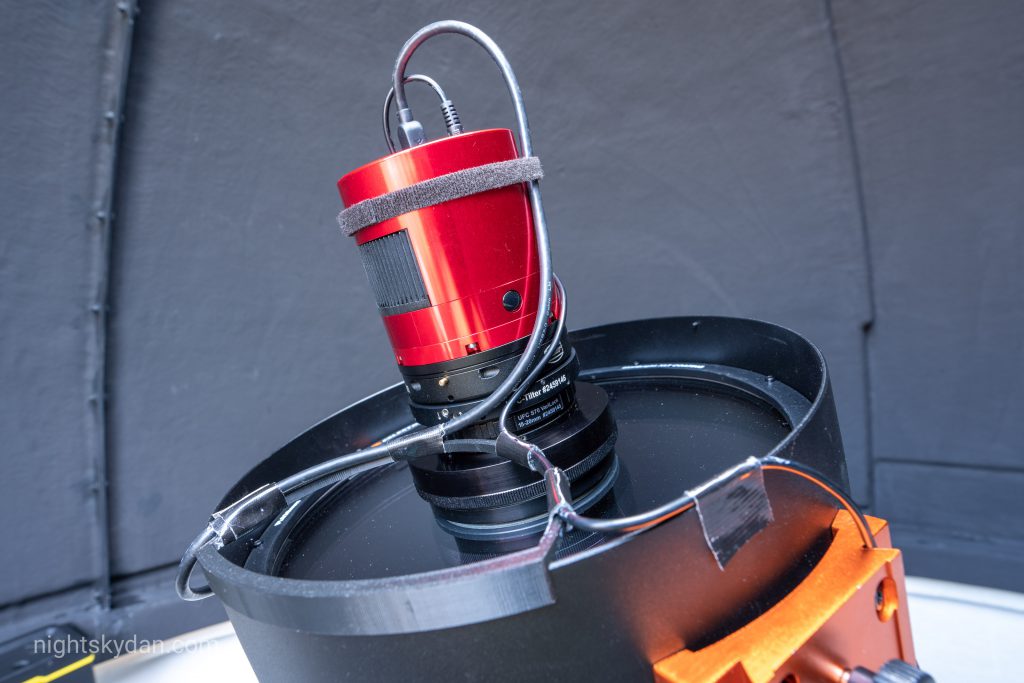
With the cables and cable router installed, the setup looks like this:
To achieve the required back-focus distance of 72.8mm, the configuration and lengths of the adapters are listed below:
- 12mm – PreciseParts custom RASA 11″ to Baader UFC adapter – this is the custom adapter that gets attached to the front of the RASA 11″;
- 17.6mm – Baader UFC S70 VariLock (2459145) – a variable length extension that adjusts from 15-20mm, and can be locked in position once set. I have mine set to about 17.6mm – I measured mine using a digital caliper;
- 10mm – Baader UFC Tilter (2459146) – fine adjustments to the tilt can be easily made using this tilt adapter. The spacing of this adapter varies from 9.75mm to 10.50mm, depending on the extent of the tilt adjustment.
- 13mm – Baader UFC Base Filter Chamber (2459110) – the filter chamber that the filter slider is inserted in to (I have an empty 50mm filter slider installed most of the time, to eliminate any stray light and stop dust from entering the imaging train);
- 2mm – Baader UFC M54 Camera-Adapter (2459117) – the adapter plate that attaches to the filter slider base.
Then, on the camera side:
- 5mm – the ASI6200MC Pro camera comes installed with a 5mm-thick M54 tilt plate and this enables the attachment of the camera to the Baader slider base above;
- 12.5mm – camera back-focus – the camera sensor itself is positioned 12.5mm from the very front of the casing.
When you are calculating the total depth, remember that the filters themselves add a small amount to the total back-focus distance. The general rule of thumb is to add a third of the filter depth (the glass thickness) to the back-focus:
- 0.7mm – the Celestron Light Pollution filter thickness is 2.1mm, which equates to 0.7mm added to the back-focus.
Taking all the above measurements into account, the total comes to the required 72.8mm.
I hope this post was useful. Please let me know in the comments below if you have any feedback or questions!
Hi Dan, can you please comment on how easy it is to reduce tilt with this setup, and how reliably it maintains that optimized tilt after the removal and reinstallation of the camera? I have nearly an identical setup for my ASI6200MC-Pro, but I find that I need to go through the entire tilt adjustment exercise each time regardless of how careful I am to not disturb the UFC/camera during removal and reinstallation. Thanks!
Hi! It’s a lot easier with the Baader UFC Tilter, otherwise I would have to remove the camera each time to tweak the tilt plate on the ZWO camera, which is a painful process! And I don’t want to touch the collimation screws on the RASA (which are now covered up by the PreciseParts adapter anyway).
I found the tilt adjustment a bit confusing at first as I had to figure out which set of screws on the UFC Tilter needed adjusting to affect which corner/side of the image. It’s then a case of capturing short exposures, checking the stars in all four corners and tweaking until I get something that shows reasonably round stars in all four corners. It’s very sensitive though, and only requires minor adjustments of the screws. I also re-focussed every few changes, as the spacing is being varied ever so slightly. The first time I adjusted the tilt, it took me just over an hour. I then realised I hadn’t added my Celestron Light Pollution Filter(!) on the front of the RASA, so I then removed the UFC adapters, added the filter, and took the opportunity to line up two sets of screws on the UFC Tilter with two of the corners of the camera sensor, reset the UFC Tilter and adjusted the tilt again in about 40-50 minutes.
Unfortunately I can’t comment on how well it holds the tilt after removal and reinstallation of the camera, as I have my rig permanently setup in an observatory now. According to Baader’s recent blog post describing the UFC Tilter, they say this though: “the whole of the camera+UFC+UFC-Tilter-assembly can be removed from the OTA for safe travel or storage and the next time it is all remounted, none or only small fine adjustments may be required for perfect chip realignment and all in only a few minutes. So your RASA set up is ready for action as fast as it is when it is taking images”. From here: https://www.baader-planetarium.com/en/blog/the-baader-ufc-tilter-adapter-part-10/
Dan:
I enjoyed reading your paper on the RASA 11! There isn’t a lot of information out there on actually getting this system to produce good results. Any additional light you may want to shed on this topic is appreciated. I don’t understand how leaving the Celestron filter in, accounts for .7mm and that allows your physical image train to be only 71.1mm?
I bought a RASA 11 earlier this year and I still haven’t captured an image where the stars look good. I have removed the Celestron filter and I am using a 1mm thick Ha filter in the image train instead. Using the stock adapter from Celestron and various spacers and a Starzonia filter drawer, I can reach the physical length of 72.8 mm. My understanding is that to compensate for the filter, I should add .33 mm to the 72.8, for a total physical distance of 73.1mm? Is this not correct?
Many Thanks!
Hi Michael,
Thanks for your comment! I have found it difficult to get good stars with a full frame sensor and the RASA 11. The UFC Tilter definitely helps to make fine adjustments to the tilt and spacing to improve the stars, but it’s very sensitive to any adjustments due to it being such a fast scope.
My stars are pretty good at the moment, apart from two of the corners where they’re not completely perfect if you zoom in, but it’s good enough for now. I don’t want to keep tweaking in case I make it worse!
You may be right about filters requiring the back-focus to be increased, rather than the filter thickness consuming part of the back-focus distance. I always understood it to be that you had to reduce the back-focus when a filter was used. I can’t remember where I saw that mentioned, but other posts such as the following article from OPT do seem to indicate you have to increase the back-focus to compensate when using a filter: https://optcorp.com/blogs/deep-sky-imaging/how-to-set-the-correct-back-focus. So maybe it is supposed to be 73.1mm in your case.
What is the exact issue you’re seeing with your stars – are they just bad on some of the corners, or across the whole image? If it’s just problems in the corners then it could be spacing, or if it’s gradual worsening of the stars from one direction to the other on the image, it could be sensor tilt.
I built my train using Hutech which I think is a subsidiary of Borg. Anyways, they make a gigantic m57 train and 52mm dual narrowband filters and I have had no challenges edge to edge with their kit. I did have a tilt issue but all that I did there is just flattened down the 6200 built in tilt to make it perfectly flat (checked with caliper). Astonishingly cheap compared to the UFC or doing preciseparts. And the guy (Ted) that I worked with testing it was amazing.
1 drawback – I can’t cover the front of the scope without completely removing the RASA 11 S70 Adapter. It looks like the preciseparts you had made may have the same challenge? I really hate unscrewing that part.
https://digiborg.wordpress.com/2021/09/27/idas-nbz-with-rasa11/
Hello Dan,
I would like to know if 4.5mm from preciseparts willl work on the RASA 11 instead of 12mm. 12mm will be too much for my setup.
Will 4.5mm from preciseparts clear the Celestron LPS filter?
I am using Canon EOS R. With what you are using for ASI6200MC. The parts I need to use my camera I come up 7.5mm to long.
I want to use the UFC tilter and UFC base filter holder.
thank you for your time
Don
Hi Don,
According to the PreciseParts configurator, an adapter with an effective length of 4.5mm is possible for them to make, but I’m not convinced it would clear the rim of the Celestron filter. I’m fairly sure it would need to have an effective length of at least 7mm-8mm to have enough space to clear the filter.
Best of luck finding a solution!
Dan
Hi Dan,
I have a RASA11 and don’t have the issue of the filter you described. Reason being is I am using the Baader UFC S70 to RASA 11 adaptor (3mm) however I removed the filter from the RASA first. Of course this will require a filter to be installed in the Baader filter holder. Celestron’s white paper states in ”Fig. 22: The RASA’s integral clear filter ensures optimal optical performance. It should be removed when using another filter in the light path. It can also be replaced with an optional light pollution filter”. I use one of the dual or multi-band filters and have been very happy with the results. The rule of thumb for filters is to add 1/3 of the filter thickness into your back-focus. A 3mm filter thickness would act the same as a 1mm spacer. I am not sure the thickness of the Celestron’s filter, but that should be taken into B.F. considerations. Thanks for the great article, I’ll now be adding the UFC Tilter to my setup. Your thoughts!
Clearskies,
Jon
Is there any other alternative to get the desired results? Doing the math on purchasing all the listed adapters, etc is astronomical in price. Pun intended. That’s in the area of $600′